


Here’s an idea for a homemade holiday gift that I have been making for years for my classroom volunteers. It’s called a “Wine Bottle Holiday Lights Decoration.” It’s very simple to put together and doesn’t cost much, if you get your supplies on sale! Read on to the tutorial below if you are interested.
I wanted to share it with you now, while you still have time to collect the wine bottles necessary to make it, if you want to do it! That’s because if you want to give this gift, the first thing you have to do is drink up! Read on below if you are interested. Other than that, I will leave you to your holiday shopping and preparations, and will continue with my regular blogging next week. Enjoy the rest of your weekend!
 |
| Wine Bottle Christmas Decoration |
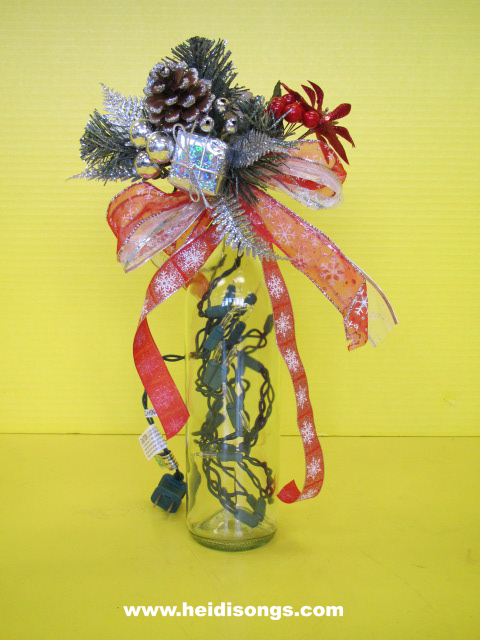
Wine Bottle Christmas Lights Decoration
Preparation:
1. Empty out a bottle of wine in whatever way you choose. 
The light colored or clear bottles seem to look the best when lit up.
2. Soak off the labels, and save the cork.
3. Dry out the bottle completely.
4. Purchase a very short string of lights; it can be no more than 30 lights long or it will not fit inside the bottle. (These can be hard to find, so look for these first before you purchase any other supplies.)
5. Purchase some 1.5 inch wide ribbon. You will need 3 feet per bottle per color, and you will need two different colors of ribbon per bottle.
6. Purchase some 7/8” wide ribbon. You will need 2 feet per bottle, and you will need just one color per bottle of this width of ribbon.
7. Purchase some decorations to put on the bottle, such as greenery or any other type of holiday “picks” that you like from your favorite craft store.
To Make it:
1. Stuff the lights down inside the bottle, leaving the plug outside the bottle.
2. Tie the wide ribbons around the neck of the bottle and tie a bow.
3. Tie the narrower ribbon under the other ribbons and tie a bow.
4. Tuck the stems of the decorative greenery down in between the wide ribbon and the bottle. Make sure that the ribbon is tied tight enough to hold the decorations down.
5. Arrange everything so that it looks nice!
6. Plug in your bottle into the nearest light socket and see how it looks. If you are happy with it, then you are done!
 |
| Wine bottle Decoration Lit Up |
I usually also attach a Starbucks gift card and a note thanking my volunteers for all of their hard work in my classroom. I was able to buy all of the supplies for these wine bottle decorations for about $2.50 each when I used a coupon and got everything on sale last week. (That didn’t include the price of the wine, of course!) I once gave this gift to a friend of mine that I know doesn’t drink, so I gave her the supplies and the directions for how to make it, along with an unopened bottle of sparkling cider so that she could put it together when she was done drinking it.

————


