


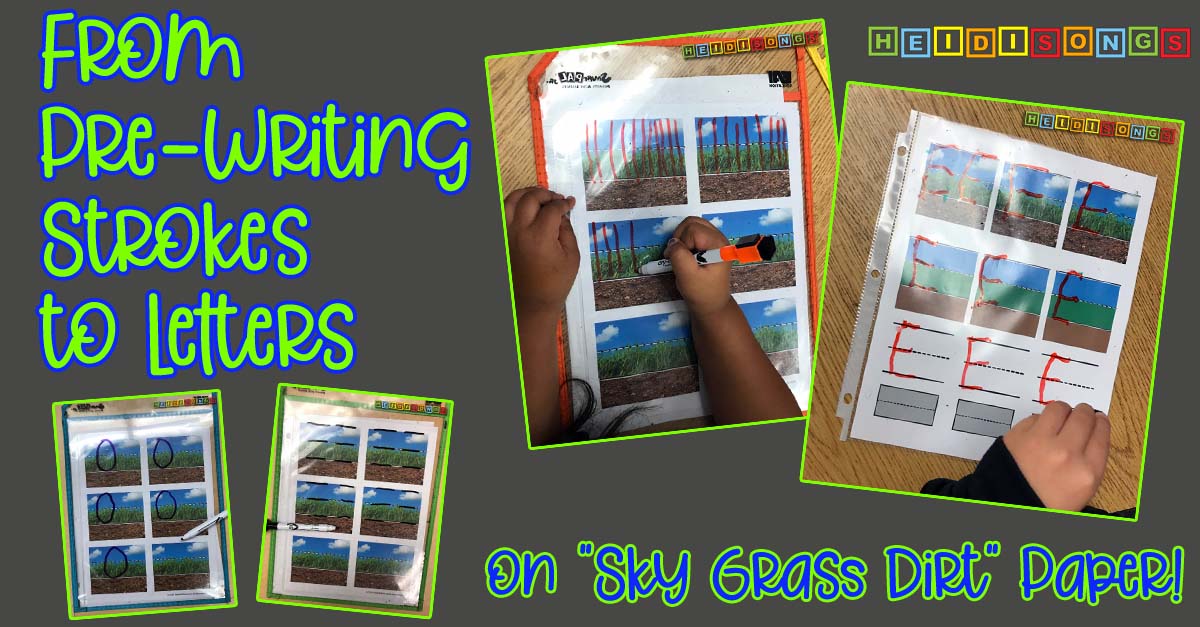
This year, we are laying the foundation for writing correctly on lined paper by practicing our pre-writing STROKES on paper with OVERSIZED LINES! And I am SUPER EXCITED to tell you about it, because the results have been just AMAZING so far! I think that this will really prepare them to do nice, neat printing when the time comes!

If you read my recent blog post, Tips for Teaching Kids to Write on Lined Paper, then you may remember the "Sky, Fence, Grass, Dirt" style of paper that my teammates and I have been using to teach the kids to print. It is pictured below. I got the idea from the website Educlime.com, which was created by a teacher friend that is an Occupational Therapist! You can find out more about her products on that blog post above that I just referenced.
![]()
My teammate Jeff had the idea of practicing the basic pre-writing strokes on the lined paper before trying to write the letters, and doing it on our "sky, fence, grass, dirt paper" rather than just on blank paper. At first I wondered if they would be able to handle it, but he was willing to give the lesson! So why not??? And lo and behold, guess what? They did JUST FINE!!! (Download it here!)
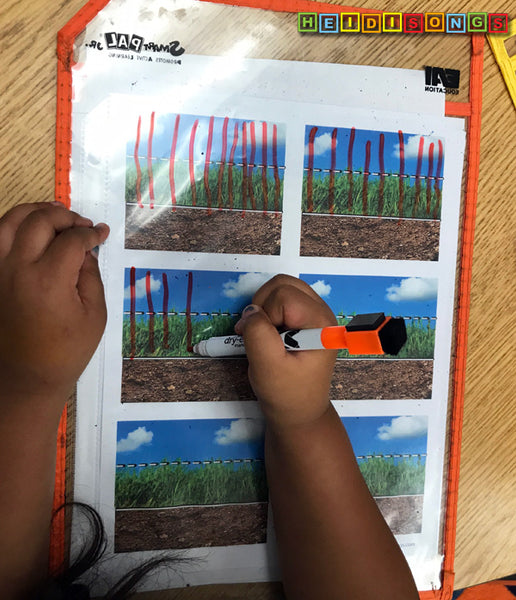
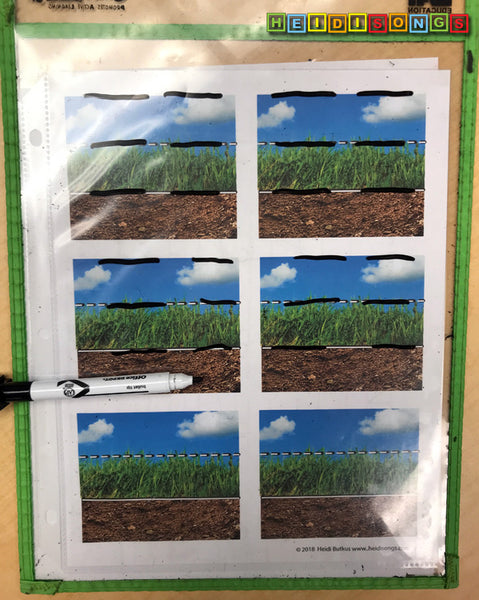
We did this once a week for three weeks. First we did vertical strokes, both large and small. We used dry erase markers on colored "sky, fence, grass, dirt" paper. The lines were VERY large and far apart, as you can see in the picture. There were lots of kids saying, "Don't go in the dirt!!!" "Hey, I didn't go in the dirt!!!" LOL!
Then we did horizontal strokes, both large and small. Some of the children said that we were making the letter I or lowercase L's.
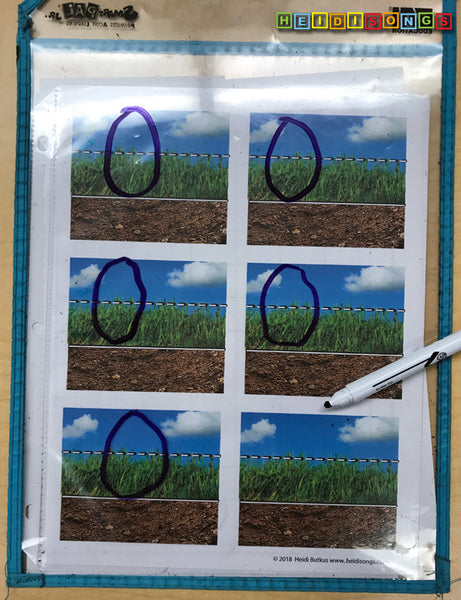
And then we did circles- or rather- ovals, actually! We made them both large and small. Several of the children commented that we were making "capital and lowercase O's. This was definitely the hardest one for the kids!
We meant to do half circles (like a C) also, but we just ran out of time. We really needed to get on track to writing a few letters, so we thought we would just try to write some capital E's and F's to catch up with where we were supposed to be.
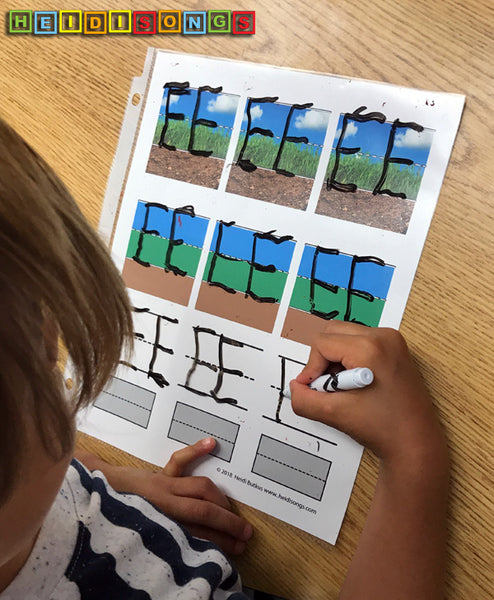
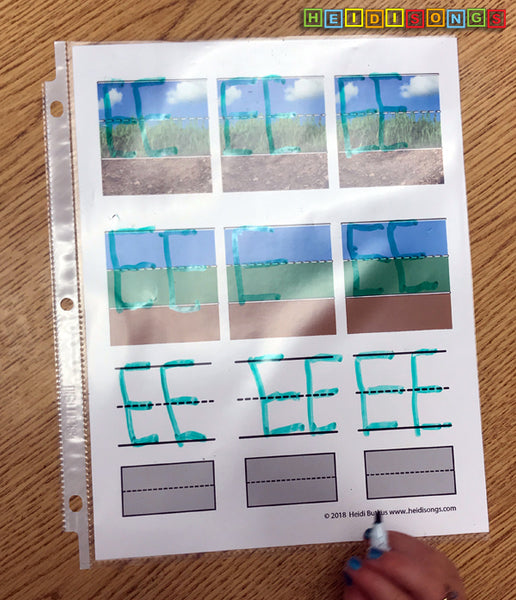
But this time, I changed the paper so that they could transition from the realistic style colored lines, to the plain colored lines, to the white lines, and then to some gray boxes that are close to what they would find in their Handwriting Without Tears workbooks. You can download this paper here.
As they worked their way down the page, a few of them commented that they thought that the white lines would be "too hard." But once we identified which lines were the sky, fence, grass, etc., then they got it! Some children pointed out that there was no dirt, and I told them that it wasn't marked on the white paper, but it was still there hiding. And they STILL had to stay out of the dirt!
Check out this video!
This all worked marvelously well, and we are looking forward to trying our next handwriting letter next week!
I hope that this was helpful to you! Do you have any suggestions to share?

----------------------------------
Follow me! Did you enjoy this post? Do me a favor and share it with your friends! And follow this blog by signing up for my email updates, or follow on Bloglovin', or follow me on TPT! I'm also on Pinterest, Facebook, Twitter, Instagram, Google+ and YouTube, too! Don't forget to sign up for our email newsletter (at the bottom of this page) for special deals and promo codes that you won't find out about anywhere else.


